

手順1.liquidファイルをもとにjsonファイル作成
まずは肩慣らしに「Product」のproduct.json
まず、これが、とあるテーマのproduct.liquid
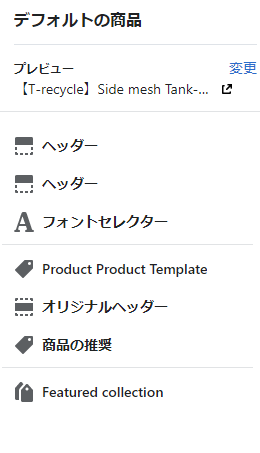
【「カスタマイズ」画面】
【liquidファイル】
{% comment %}
  The contents of the product.liquid template can be found in /sections/product-template.liquid
{% endcomment %}

{% section 'product--product-template' %}
<div class="max-w-6xl mb-8 md:mb-14 mx-auto px-6">
  <div id="shopify-product-reviews" data-id="{{product.id}}">{{ product.metafields.spr.reviews }}</div>
</div>

<style>
  .spr-container {
    padding: 0;
  }
  .spr-header {
    width: 100%;
  }
  .spr-header-title {
    text-align: left;
    font-size: 16px;
    font-weight: 700;
    padding-bottom: 12px;
    border-bottom: 2px solid #707070;
  }
  .spr-summary {
    display: flex;
    font-size: 14px;
    width: 100%;
  }
  .spr-summary > .spr-starrating {
    display: none;
  }
  .spr-summary-caption {
    flex-grow: 1;
    text-align: left;
  }
  .spr-headerspr-review-header-title {
    font-size: 14px;
  }
  .spr-review-header-byline {
    font-style: normal;
    width: 100%;
  }
  .spr-review-content {
    padding-top: 10px;
    border-top: 1px solid #EEEEEE;
  }
  .spr-button {
    background-color: #333!important;
    font-size: 14px!important;
  }
  @media (min-width: 768px) {
    .spr-header {
      display: flex;
      width: 100%;
      padding-bottom: 12px;
      border-bottom: 2px solid #707070;
    }
    .spr-header-title {
      width: 120px;
      margin: 0 15px 0 0;
      padding-bottom: 0;
      border-bottom: 0px solid #707070;
    }
  }
</style>

{% section 'top--heading' %}
{% section 'product-recommendations' %}
↓
①不要なhtmlコードをよける(どっか別のテキストエディタにコピーしておく)
{% section 'product--product-template' %}
{{ product.metafields.spr.reviews }}
{% section 'top--heading' %}
{% section 'product-recommendations' %}
JSONにhtmlコードは記述できないので、ここでよけたhtmlコードは、呼び出しているsectionファイルに移動するか、新たにsectionファイルとして作成する必要がある。
{{ product.metafields.spr.reviews }}これだけはセクションを呼び出しておらず、このテンプレート内でproductの登録情報を呼び出している箇所であった。これもJSON変換時にセクションとして追加することにする。
↓
②sectionを呼び出している要素をJSONに書き換える。
上記3つのsectionを呼び出している要素をJSONに書き換える。
構造化ルールは、こちらの参考資料を一読すると、理解できる。
【Shopify公式devページ】JSON templates

Shopify Uniteで刷新されたLiquidのJSON templatesを理解する
{
  "sections": {
    "main": {
      "type": "product--product-template",
      "settings": {}
    },
    "top-heading": {
      "type": "top--heading",
      "settings": {}
    },
    "metafields-spr-reviews": {
      "type": "metafields-spr-reviews",
      "settings": {}
    },
    "product-recommendations": {
      "type": "product-recommendations",
      "settings": {}
    }
  },
  "order": [
    "main",
    "top-heading",
    "metafields-spr-reviews",
    "product-recommendations"
  ]
}
もともとあったproduct.liquidは消せば、新規で作成したproduct.jsonに完全に置き換わる。
【「カスタマイズ」画面】は以下のようになった。

metafields-spr-reviewsが、セクションの一部として明確に追加される形になった。
強敵「ホームページ」のindex.json
まずは「ホームページ」をつかさどるテンプレート、
index.liquidの形は、ほぼどのテーマでも
{{ content_for_index }}である!以上!
これを↓のように書き換える必要があーーる!
index.jsonの形(Dawnの例)
{
  "sections": {
    "image_banner": {
      "type": "image-banner",
      "blocks": {
        "heading": {
          "type": "heading",
          "settings": {
            "heading": "Talk about your brand"
          }
        },
        "button": {
          "type": "buttons",
          "settings": {
            "button_label_1": "Shop all",
            "button_link_1": "shopify:\/\/collections\/all",
            "button_label_2": ""
          }
        }
      },
      "block_order": [
        "heading",
        "button"
      ],
      "settings": {
        "desktop_text_box_position": "flex-end"
      }
    },
    "featured_products": {
      "type": "featured-collection",
      "settings": {
        "title": "Featured products"
      }
    },
    "image_text": {
      "type": "image-with-text",
      "blocks": {
        "heading": {
          "type": "heading",
          "settings": {}
        },
        "text": {
          "type": "text",
          "settings": {}
        },
        "button": {
          "type": "button",
          "settings": {}
        }
      },
      "block_order": [
        "heading",
        "text",
        "button"
      ],
      "settings": {}
    }
  },
  "order": [
    "image_banner",
    "featured_products",
    "image_text"
  ]
}
index.jsonにおいては、書き換えるというか別物やがなあんさんこれ、、これしかしこれ。。
そもそも、JSONの記述は { } の入れ子構造を間違うとエラーを起こすので、直にコードを書いているとかなり繊細な作業になる。
そこで、以下のようなJSONを簡単に生成できるWebツールを使用するとコード記述にエネルギーを使わなくてよいので簡単だ。
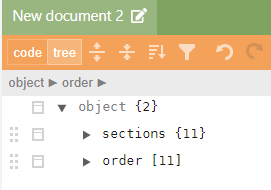
JSON Editor

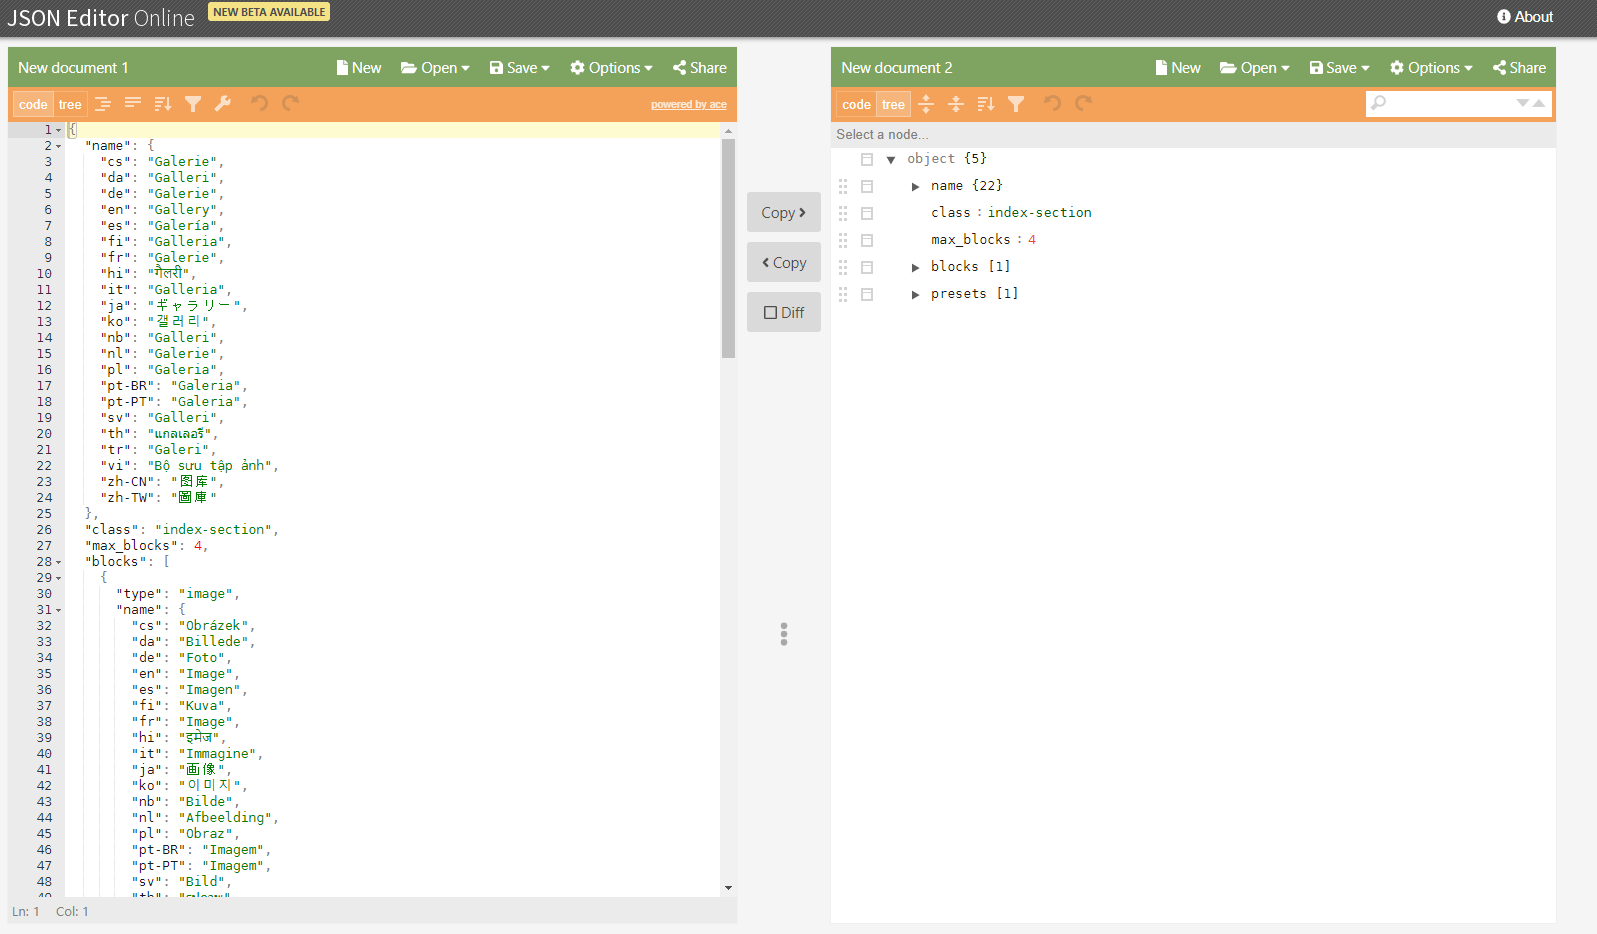
左にJSON、右にその構造をツリー形式で表現してくれており、どちらをいじっても一方に同期される。
本来割くべき構造の部分だけにエネルギーを使って、生成されたJSON自体はコピペして終わりだ。
さて話を戻して、
index.liquidのときのすっきりしていた情報、あれをいったいどうしたらJSON形式にできるのか!
僕はこうした。
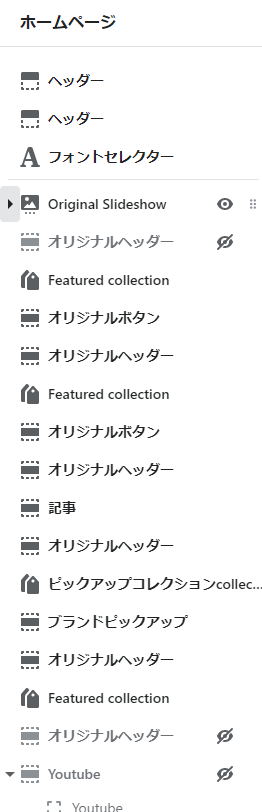
上記、管理画面「カズタマイズ」で見たときの、JSON形式にする前の(1.0のときの)、index.liquidで作成したセクションの構造である。
1.0ではセクションはあくまで「ホームページ」用に作成されるべきものであり、「カスタマイズ」で追加、並び替え、登録を行った情報は、ShopifyのストアのDBに保管される。
今回、JSONになることで、「ホームページ」に使用できるセクションをJSONで明示しておく必要があるため、「カスタマイズ」で確認できるセクションをすべてJSONに記述する。
{
  "sections": {
    "top-mainvis": {
      "type": "top-mainvis",
      "settings": {}
    },
    "top-heading": {
      "type": "top-heading",
      "settings": {}
    },
    "top-brand-pickup": {
      "type": "top-brand-pickup",
      "settings": {}
    },
    "top-column": {
      "type": "top-column",
      "settings": {}
    },
    "top-hero-slideshow": {
      "type": "top-hero-slideshow",
      "settings": {}
    },
    "top-collection": {
      "type": "top-collection",
      "settings": {}
    },
    "top-news": {
      "type": "top-news",
      "settings": {}
    },
    "top-original-button": {
      "type": "top-original-button",
      "settings": {}
    },
    "top-pickup-collection": {
      "type": "top-pickup-collection",
      "settings": {}
    },
    "top-ranking-collection": {
      "type": "top-ranking-collection",
      "settings": {}
    },
    "top-youtube": {
      "type": "top-youtube",
      "settings": {}
    }
  },
  "order": [
    "top-mainvis",
    "top-collection",
    "top-original-button",
    "top-heading",
    "top-news",
    "top-column",
    "top-pickup-collection",
    "top-ranking-collection",
    "top-hero-slideshow",
    "top-brand-pickup",
    "top-youtube"
  ]
}
この時点では、セクションの表示/非表示をつかさどるJSON情報はない。
また、セクションのブロック最大数情報もない。
ひとまずindex.jsonを設置するための、最低限の記述のみ。
JSON生成ツールで見ても、sectionとorderの数が一致しているので、これでShopifyにテンプレートファイルとして認識はしてもらえる。
骨は折れるが、わりと単調な作業なので、消費するのは集中力と時間のみ。
この作業中に、突発で別の作業が入ってこないことを祈って、集中力を保ってこれのみの作業をしましょう。
のちに「カスタマイズ」画面でページごとにセクションの複製や並び替えをする
のちに「カスタマイズ」画面でページごとにセクションの複製や並び替えをすることにして、注意が必要です。
「カスタマイズ」画面でそうした作業を行った際に、バックエンドでJSONファイルのorder情報(並び順情報)が動的に変更されてしまうのです。
なので、管理画面で視覚的作業でこうした変更をおこなったあとは、必ずテーマファイルをローカルにダウンロードして、templateディレクトリを最新の状態に更新するようにしましょう。
GithubをShopifyに接続している場合は、Shopifyの「カスタマイズ」でセクションの編集をすると、Github側で以下のように表示されます。

なので、当然Github側からプッシュをしようとすると、
! [rejected]        [ブランチ名] -> [ブランチ名] (fetch first)
error: failed to push some refs to 'https://github.com/[Githubアカウント]'
とエラーを返されます。
「リモートのファイルにローカルのファイルより最新版があるら、そのファイルにpushできないですよ」ということみたいです。
なのでこの場合、一度
git fetch
git pull
を行って、ローカルに最新のJSONファイルをプルしてからプッシュすればエラーなくアップロードできます。