
ブログのリッチテキストのメタフィールド登録はできる、でも表示で壁にぶつかる
ブログ記事に、ブログとは別にリッチテキスト形式でメタフィールドを登録できるようにしましたが、Shopify管理画面上で、ひとまずノーコードでメタフィールド登録をして、さあこれをフロント画面に表示をどうするか、となって、ちょっとした壁にぶつかりました。
まずはノーコードでブログのリッチテキストのメタフィールドを管理画面で定義
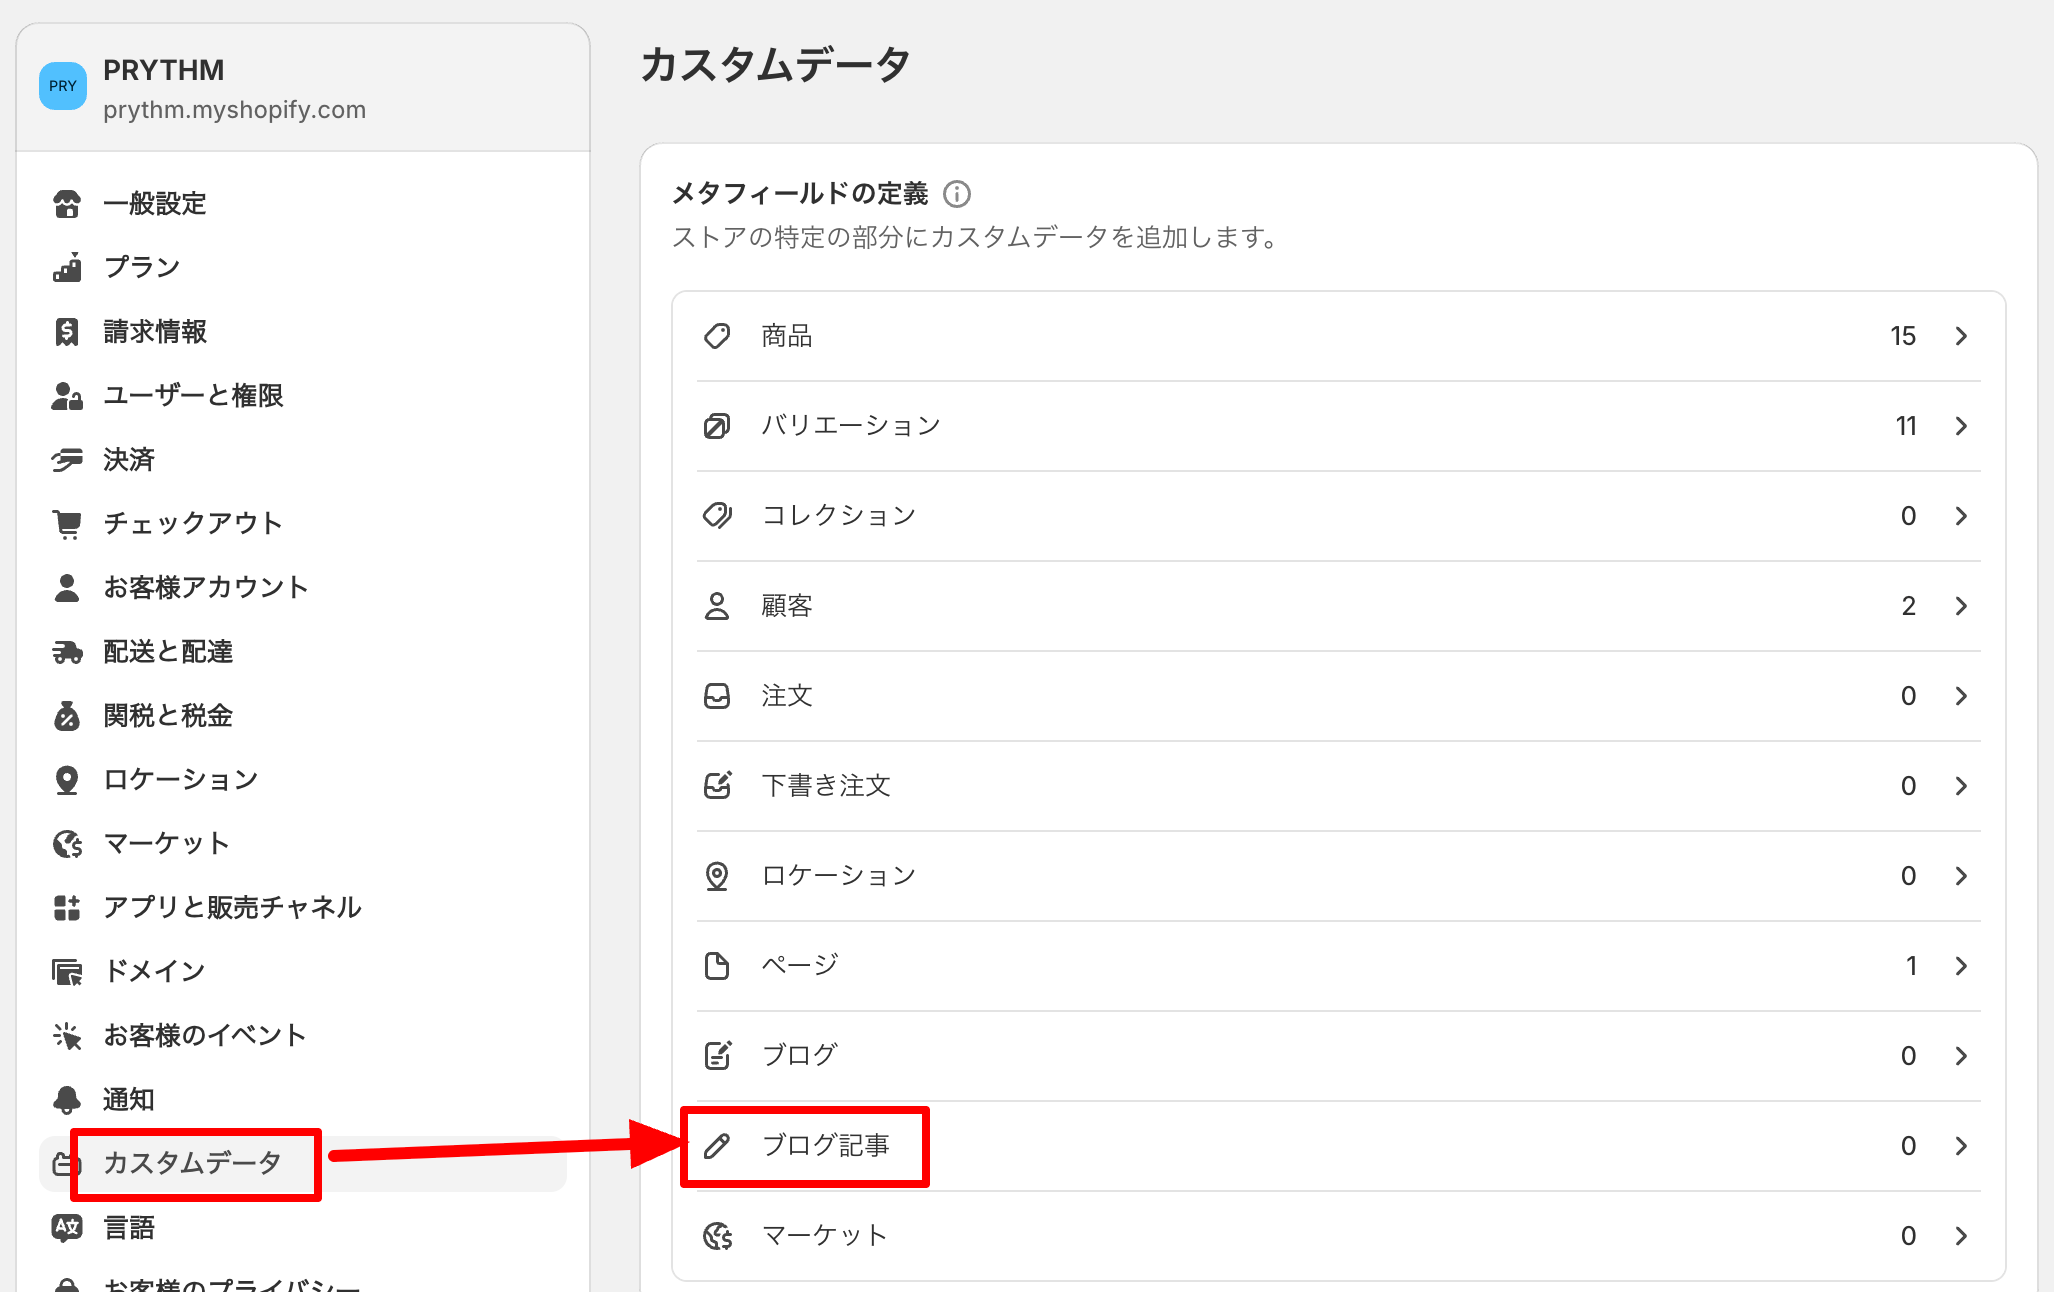
設定 > カスタムデータ > ブログ記事 を選択

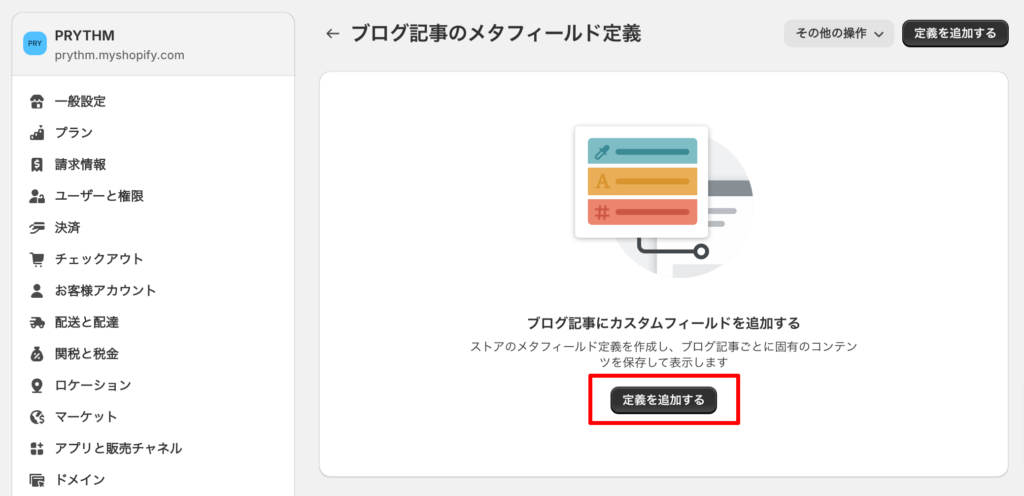
定義が作成ならこのような画面になるので「定義を追加する」を押す
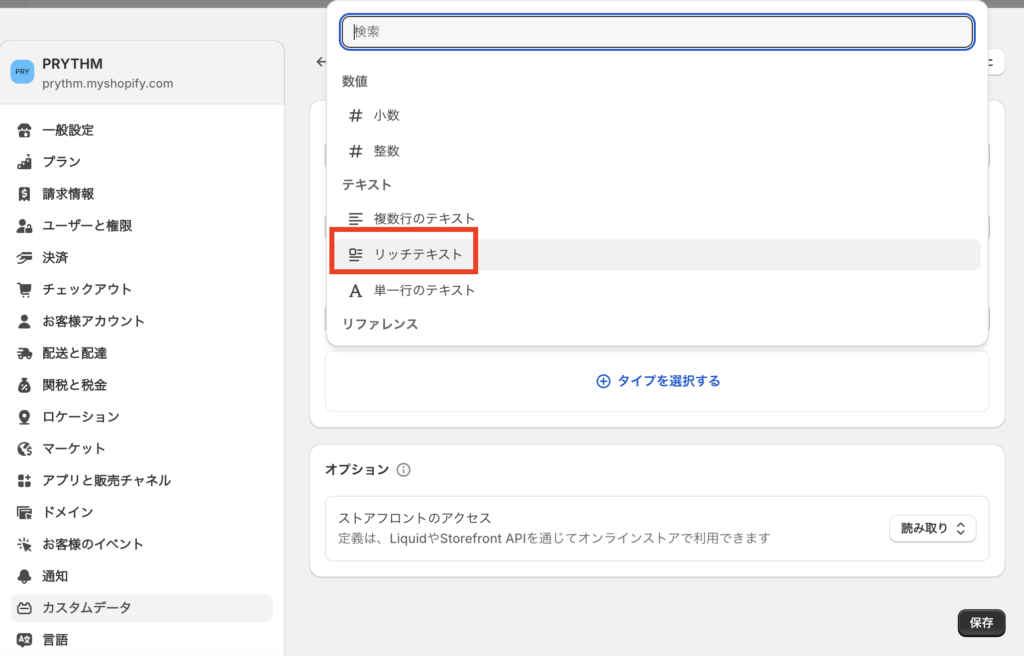
「タイプを選択する」の中に「リッチテキスト」があるのでそれを選択。
この例では、「名前」と「ネームスペースとキー」それぞれを以下のように登録する。
名前:item_name_text
ネームスペースとキー:custom.item_name_text
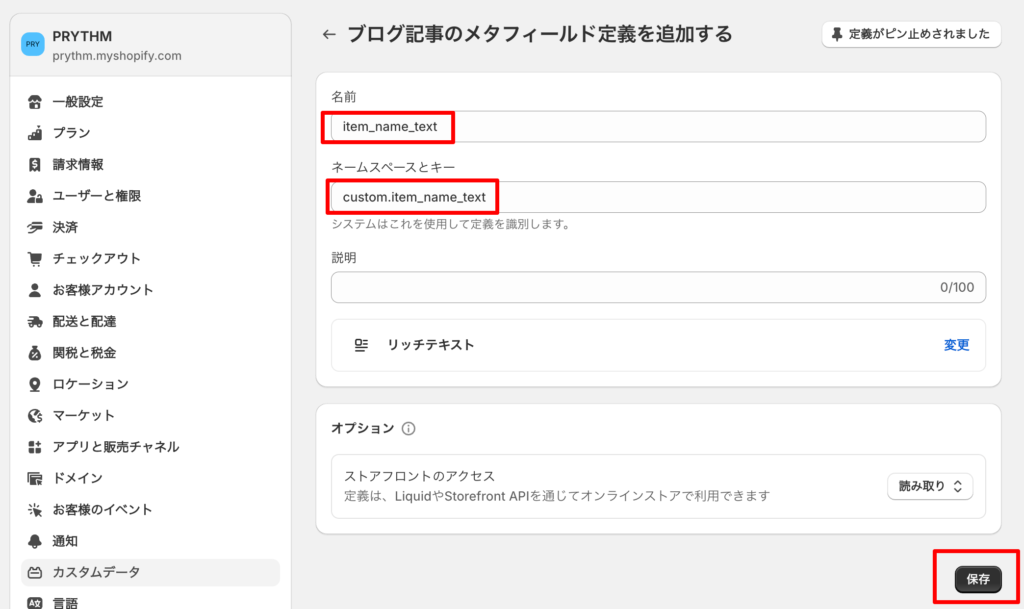
そして、「保存」で登録完了。
このように、記事作成画内に「ブログ記事のメタフィールド」という入力枠が作成された。
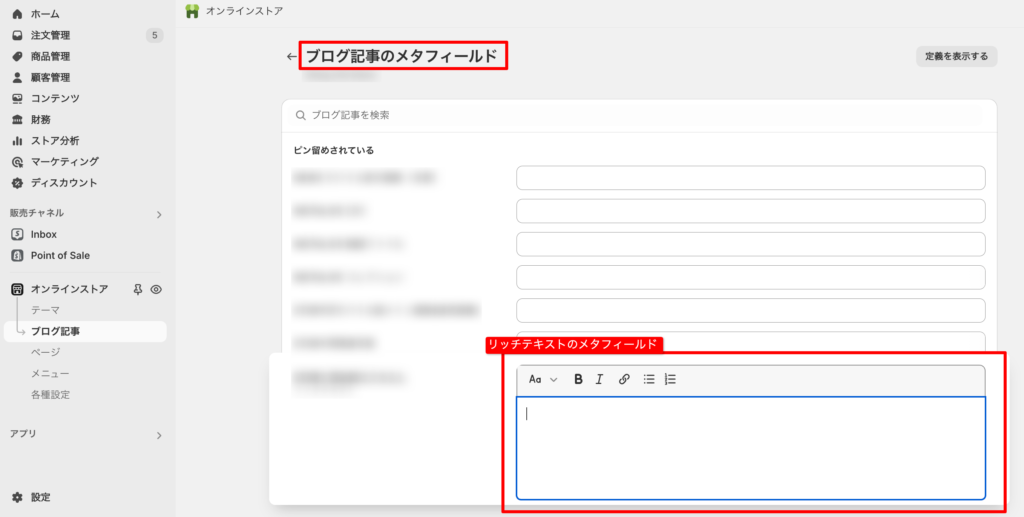
これをどう出力するか?
Shopifyで、リッチテキストをセクションのスキーマで登録できるようにした場合は、{{ section.setting.[id名] | newline_to_br }}のような記述だけで、Shopifyが用意したHTMLコードで出力されて、テキストエディタで登録した通りの見出しレベル、リンク、太字、斜体でHTMLコードを出力してくれた。
しかし登録メタフィールドからHTMLを出力するときは、自分でどんなHTMLタグで囲まれた文字として出力するかを逐一定義してあげないといけない。手をかけないとこんな感じです。
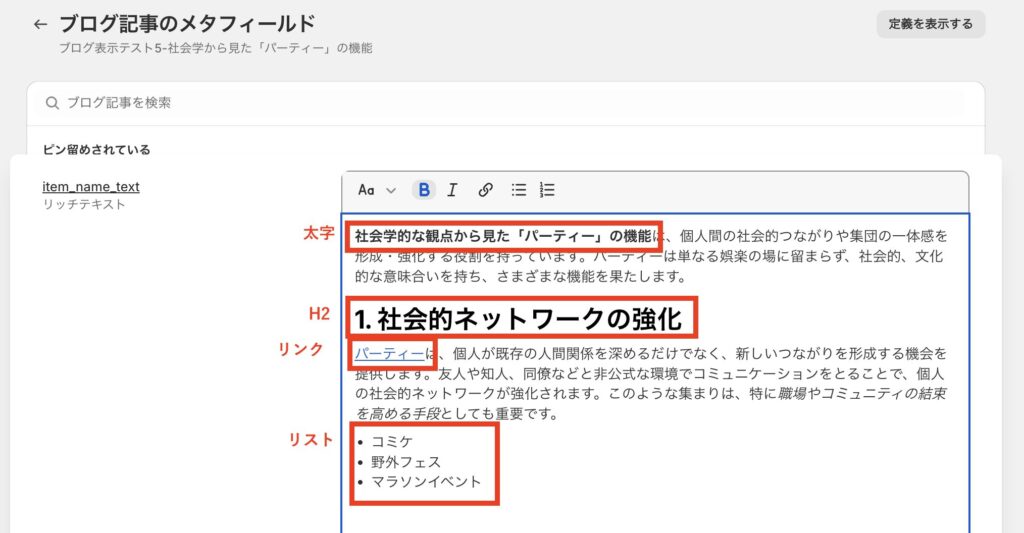
メタフィールドにこのうように登録してみる。
↓
何も手をいれないときの表示結果
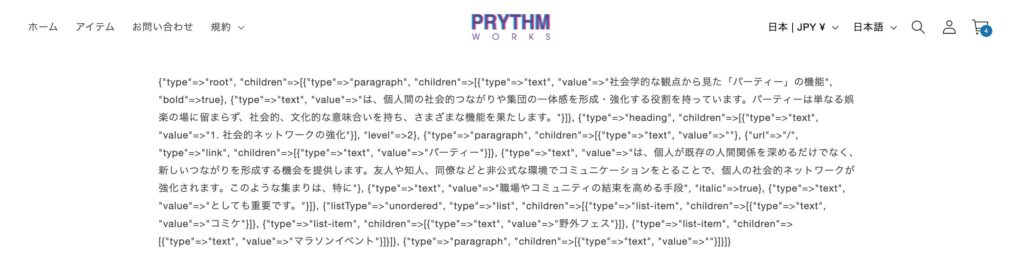
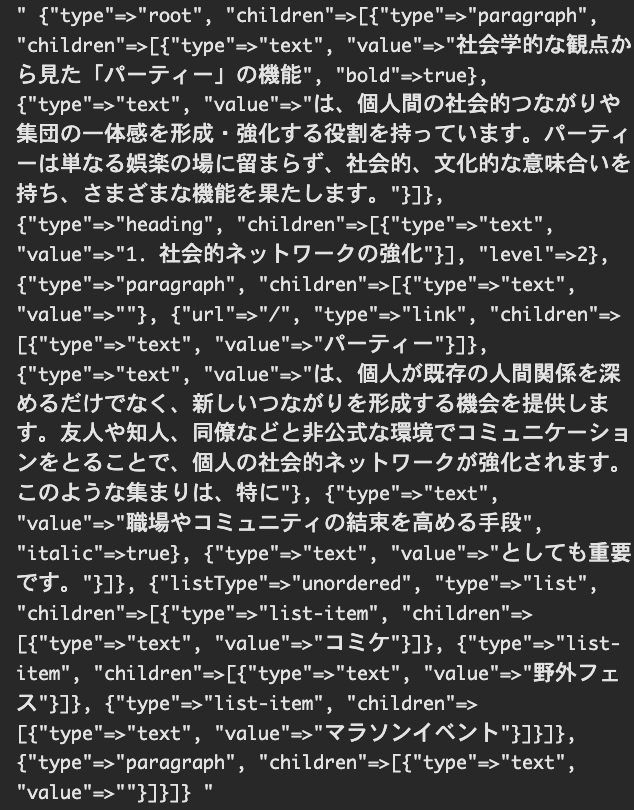
HTMLコードとして出力されていない。どうやらメタフィールドではリッチテキストはJSONデータとして保持されているらしいので、これを整形して出力する必要がある。
  {% if article.metafields.custom.item_name_text != blank %}
    {% assign data = article.metafields.custom.item_name_text.value %}
    <div class="article_rich_text page-width">
      {{data |  newline_to_br}}
    </div>
  {% endif %}
↓ 加工後のコード
{% if article.metafields.custom.item_name_text != blank %}
{% assign data = article.metafields.custom.item_name_text.value %}
<div class="article_rich_text page-width">
{% for child in data.children %}
{% if child.type == "heading" %}
<h{{ child.level }} class="title{{ child.level }}">{{ child.children[0].value }}</h{{ child.level }}>
{% elsif child.type == "paragraph" %}
<p>
{% for text in child.children %}
{% if text.bold %}
<strong>{{ text.value }}</strong>
{% elsif text.italic %}
<em>{{ text.value }}</em>
{% elsif text.url %}
<a href="{{ text.url }}" target="{{ text.target }}">{{ text.children[0].value }}</a>
{% else %}
{{ text.value }}
{% endif %}
{% endfor %}
</p>
{% elsif child.type == "list" %}
{% if child.listType == "unordered" %}
<ul>
{% for item in child.children %}
<li>{{ item.children[0].value }}</li>
{% endfor %}
</ul>
{% elsif child.listType == "ordered" %}
<ol>
{% for item in child.children %}
<li>{{ item.children[0].value }}</li>
{% endfor %}
</ol>
{% endif %}
{% endif %}
{% endfor %}
</div>
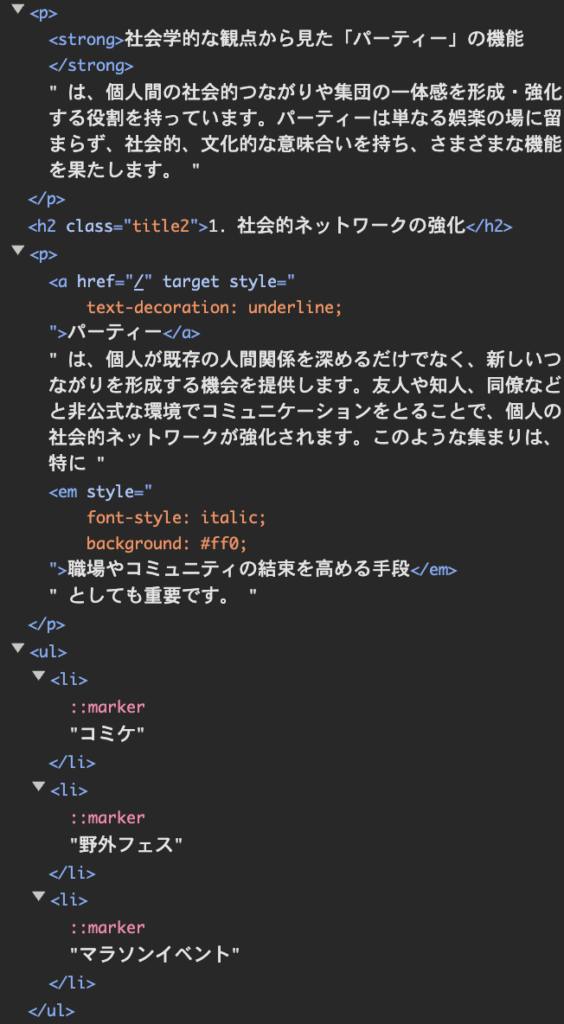
{% endif %}↓ 加工後のコードで出力されたリッチテキスト
きちんとHTMLコードとして出力されている。
このコードは、Shopifyのテーマ内で商品のメタフィールド(リッチテキスト形式)を解析し、HTMLとして出力するためのLiquidテンプレートコードです。以下に主な機能を解説します:
- メタフィールドのデータ取得:
{% assign data = product.metafields.asdqwe.test.value %}で、特定の商品のメタフィールドからデータを取得しています。 - データの反復処理:
{% for child in data.children %}で、メタフィールドの各要素(子要素)を順に処理します。 - 要素タイプの判別と対応するHTML生成:
- 見出し(heading):
{% if child.type == "heading" %}で判別し、適切なレベルの<h1>〜<h6>タグを生成します。 - 段落(paragraph):テキストの装飾(太字、イタリック、リンク)を適用しながら
<p>タグ内にコンテンツを生成します。 - リスト:順序なし(
<ul>)と順序あり(<ol>)リストを適切に生成します。
- 見出し(heading):
- HTMLの構造化:生成されたコンテンツを
<section>と<div>タグで囲み、整理された構造にします。
このコードにより、Shopifyの管理画面で入力されたリッチテキスト形式のメタフィールドを、ウェブサイト上で適切にフォーマットされたHTMLとして表示することができます。